 Loading... Please wait...
- 8636920906
- Gift Certificates
- My Account
- Home
- Tripod Heads & Bases
- FlexShooter Pro
Categories
FlexShooter Pro
Product Description
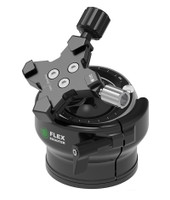
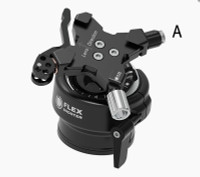
The Flexshooter Pro Tripod Head
Years ago I tried a double ballhead and was not at all impressed. About four months ago I got my hands on a FlexShooter Pro. The first thing that I did was to let the manufacturer know that in my opinion, the knob on the clamp was a bit too small. He instituted a design change.
With my heavy travel schedule and my newfound love of hand holding the 500 PF, I did not commit to using the FlexShooter Pro until recently. For the next two weeks I put my FlexShooter Pro to work. As I learned more about how to set up and use the FlexShooter Pro, to say that I was and am impressed would be an understatement. The head is amazing.
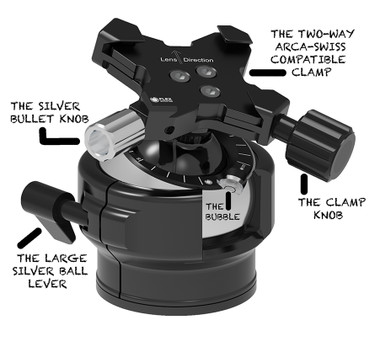
To begin, the FlexShooter Pro is a ballhead that acts like a gimbal head, only better. Why better? Once your rig is set up properly — see the tutorial below — the lens actually stays where you point it without your having to lock up the head! Where you point the lens is what you get. That thanks to the patented spring system design that is made from the most durable artificial rubber on earth, polyurethane. It was chosen because at a given volume it is capable of storing much more elastic energy than even steel springs. In short, your rig will be perfectly counter-balanced: point it and leave it. The FlexShooter Pro is designed to handle loads of up to 99 pounds so it will easily handle your longest telephoto lens with ease and with efficiency. No more ballhead flop, no more crushed fingers, and far fewer missed shots; you are always ready to go with the FlexShooter Pro. And once you center the bubble in the silver ball and level your camera body by rotating the lens in the tripod collar, you can point your telephoto lens anywhere and be assured that your rig is square to the world with level horizons. And the same is true when working with short lenses mounted via a plate on the camera body.
While the above is hard to believe, it gets even better: the FlexShooter Pro is far more versatile than any gimbal head — actually, it’s a no contest. As above, you can use your longest telephoto lens. And the same is true for your intermediate telephoto lenses, for your intermediate telephoto zooms, and for your short telephoto and macro lenses. And — and this is a huge plus — you can use your FlexShooter Pro for scenic photography with the camera body mounted — thanks to the amazing two-way Arca-Swiss compatible clamp. There is no longer a need to travel with and carry a small ballhead if you wish to do photography with short lenses that do not have a tripod collar. Only the FlexShooter Pro fits all!
Once you have set the desired tension for the rig you are using — less for big glass, a bit more for the shorter lenses — and you want to lock the head down, there is absolutely no ballhead creep. What you see is what you get. I have never seen or used any tripod head that eliminates ballhead creep the way that the FlexShooter Pro does. Frame it, tighten the Silver Bullet Knob and forget it. This is a Godsend especially for scenic and for macro photographers.
The FlexShooter Pro weighs one pound, 8.9 ounces, just 1.2 ounces more than my Mongoose M3.6 (that tips the scales at one pound, 7.7 ounces). Do compare both with the Wimberley V2 head at a hefty three pounds, 3.4 ounces.
In Your Home — Learning the Set-up
- 1-First tighten (clockwise) the Large Silver Ball Lever (black) to lock the large silver ball. Note, the position of the Large Silver Ball Lever can be adjusted as needed by pulling the lever straight out and then rotating and releasing it.
- 2-Screw the head onto your tripod. To tighten it securely, grasp the black housing firmly with both hands and rotate the head in a clockwise direction. (To remove the head from the tripod for travel, reverse the procedure.)
- 3-Stand behind your tripod with the front leg of your tripod pointing at your (imaginary) subject.
- 4-Loosen (counter-clockwise) the silver ball with the Large Silver Ball Lever (black) so that housing rotates on the tripod. Position the housing so that the Large Silver Ball Lever (black) is on your left with the seam pointed directly at you. Tighten (clockwise) the Large Silver Ball Lever (black) ever-so-slightly to put just a bit of tension on the large silver ball. Then, holding the housing in your left hand, rotate the silver ball with the fingertips of your right hand until the bubble level is at the 90 degree position, that is, on your right. This will enable you to see the bubble when your telephoto lens is mounted. (You may need to re-position the level when mounting a camera body on the head.)
- 5-With the Silver Bullet Knob loosened (clockwise), rotate the clamp so that the Lens Direction Arrow that is inscribed on the base of the clamp is pointed directly away from you. Now grasp the clamp and — looking straight down at the bubble, center the bubble perfectly in the scribed circle (you might need your reading glasses!) and then tighten the silver ball in its now perfectly level position by rotating the the Large Silver Ball Lever (black) firmly clockwise.
- 6-Now it is time to mount your big telephoto lens very carefully. Be sure to finger-tighten (clockwise) the Silver Bullet Knob before mounting the lens. Because of the unique design of the two-way Arca-Swiss compatible clamp, it is easier to screw up when mounting the lens than it is with either a Mongoose or a Wimberley. And the stop-stud system on the Wimberley is not available on the FlexShooter Pro. Be absolutely sure to confirm visually that the lens plate (more on those below) is seated properly in the jaws of the clamp. . Balance the lens perfectly by moving the lens plate or low foot forward and backward in the clamp as needed and be sure to check both sides of the clamp before you tighten (clockwise) the clamp knob firmly.
- 7- Using either the click-mark on the lens barrel or better yet, your in-camera level, rotate the lens in the tripod collar until it shows perfectly level. Amazingly, if you have followed the instructions above perfectly, you can point your lens up or down or left or right and the back of the camera will be perfectly square to the world. All of your herons and egrets will be standing straight up and all of your ducks will be swimming on a level pond. I call this the the always-true-level feature.
- 8- Now it is time to learn to use the Silver Bullet Knob to set the desired tension. From completely locked down (clockwise) it only takes three full turns to loosen (counter-clockwise) the small black ball completely. And you will rarely want to lock down the head completely when using a big telephoto lens. I do most of my bird photography with the small black ball adjusted to loose. That makes it easy to follow moving subjects including birds in flight. When employing slower shutter speeds, I will often finger-tighten (clockwise) the Silver Bullet Knob . Whatever tension you set, if you point the lens up or down or left or right and let it go, it will not move. And best of all, the lens is rendered weightless.
For a demonstration of how this amazing head functions and to learn to set yours up, see the video here:


