 Loading... Please wait...
- 8636920906
- Gift Certificates
- My Account
- Home
- Tripod Heads & Bases
- Levered-Clamp FlexShooter Pro
Categories
Levered-Clamp FlexShooter Pro
Product Description
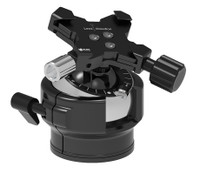
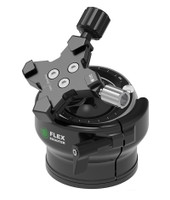
The Levered-Clamp FlexShooter Pro Head: $699.00 plus shipping
Before I began carrying the FlexShooter Pro, I insisted that Csaba Karai, the Hungrarian designer, make me a batch with a larger knob. He kindly did and continues to do so. But even with the larger knob, some folks — especially those with relatively weak fingers — prefer a levered clamp to a clamp with a knob as they are easier to operate.
Do understand that the Levered-Clamp FlexShooter Pro Head maintains all the great benefits of the FlexShooter Pro, the ballhead that acts like a gimbal and works great with any rig from the longest, heaviest super-telephoto lens to a camera-body-mounted wide angle. The latter is possible because of the bi-directional clamp; it is no longer necesssary to travel with a gimbal head for long lens photography and a ballhead for scenic photography …
Setting the Tension
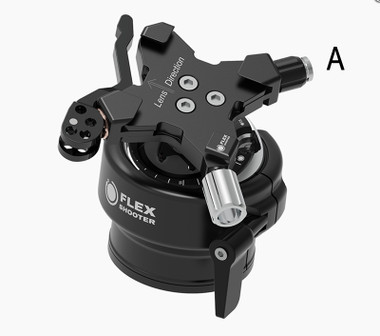
The Levered-Clamp FlexShooter Pro Head ships with the tension knob (A) at the loosest setting, with the knob fully turned router-clockwise. Note: not all “Arca-Swiss compatible” lens plates have identical measurements. You can follow the steps below with the plate or a short lens (or camera body) in your left hand, and the head in your right hand (or resting on a table). If you are setting the tension for a plate that is affixed to a super-telephoto lens, it is recommended that you mount the head to a sturdy tripod before following the steps below.
Here is how to set the tension correctly for your specific lens plate.
1- Begin with the lever open and then close it. It should close very easily.
2- Pull the lever to open, place the lens plate into the jaws of the clamp, and close the lever. Again, it should close very easily. With the lever fully open, tighten the tension knob (A) two turns (clockwise).
3- Now close the lever. If it closes with a decent amount of force needed, you have set the proper tension. Set it and forget it unless you are using a different plate (that might have a slightly different width).
4- If it still closes easily, tighten the tension knob (A) two more turns (clockwise). Repeat until you need a decent amount of force to close the lever. Do not force things. If it is very difficult to close the lever, loosen the tension knob (A) one turn (counter-clockwise).
5- By experimenting, you will learn to set the correct tension quickly and easily. Once you get it right with a decent (but not excessive!) amount of force needed to close the lever, you are good to go. Set it and forget it; the tension knob will stay in place.
If you do some serious macro photography, and do not own and use a focusing rail, I recommend that you use the FlexShooter Pro rather than the Levered-Clamp FlexShooter Pro so that you can move the plate in the jaws as needed when pointing your macro lens downward …
For a demonstration of how this amazing head functions and to learn to set yours up, see the video here:
Find Similar Products by Category
Vendors Other Products
Product Reviews
-
Well made and fits the purpose perfectly!

Posted by Forrest in Tn. on Mar 30th 2021
This Flex shooter head with lever was quick and easy to install. It
works so well with my big lens and Camera body. I am very happy with it and it is much smaller and lighter than the gimbal head head I was using. There are one or two metal corners near the knobs that are a little sharp edged but that is the only small negative thing I have found. Otherwise it feels extremely well-made and very high quality and a pleasure to use! They shipped it very quickly. Thanks guys!
-
Simply Amazing

Posted by Brent on Feb 12th 2021
I love the flexshooter pro with the lever so much that I'm ordering my 2nd one! I have found that the flexshooter works really well on a monopod, so I'm getting a 2nd unit so both my monopod and tripod are always ready to go without taking a head on/off.
-
Levered-Clamp Flexshooter Pro

Posted by Al Haynes on Sep 14th 2020
Previously I was using a RRS Pano Gimble. The Flexshooter is 3 times lighter and takes up less room in my suitcase. Great for traveling.


