 Loading... Please wait...
- 8636920906
- Gift Certificates
- My Account
- Home
- Books, Videos and Training / Instruction
- Books and E-Guides by Arthur Morris
- The Professional Post Processing Guide Based on NeatImage V 8.2
Categories
The Professional Post Processing Guide Based on NeatImage V 8.2
Product Description
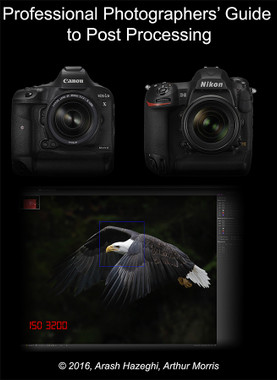
The Professional Photographers’ Guide to Post Processing
NeatImage v8.2 Update
Your e-book will be delivered either by e-mail or by Hightail (for download).
A separate purchase of the Pro Version of NeatImage v8.2 is required.
Click here to purchase the Pro Version NeatImage v8.2
https://ni.neatvideo.com/download
Important note: the original Professional Photographers’ Guide to Post Processing was based on NeatImage v7.6. NeatImage released a new version, v8.2. v8.2 is a bit more complicated than v7.6. artie continues to use v7.6 which is simpler and easier to use. As far as the quality of the results, v7.6 and v8.2 are indistinguishable.
Arash’s Take on the guide…
In recent years, advances in CMOS image sensor technology have enabled DSLR cameras to capture detailed, high-quality images at very high ISO settings; this has taken low-light and action photography to a whole new level. To make the most out of your camera’s high ISO performance, proper post processing, including advanced noise reduction and efficient sharpening, is essential. The first step in effective post-processing is executing an optimal RAW conversion that produces a TIFF file that is clean, free of artifacts, and detailed, without too much sharpening or strong noise reduction. For Canon users, we recommend converting your RAW images in Canon Digital Photo Professional 4 (DPP 4). We cover exactly how to do that in the DPP 4 RAW Conversion Guide. This new supplemental guide deals with the post-RAW conversion processing of your TIFF files for final presentation.
In order to use this guide, you need Adobe Photoshop (CS4 or later) as well as the Neat Image noise reduction plugin for Photoshop (as detailed above). We recommend the pro version. You will need an up-to-date PC or Mac computer to process your files. A modern quad-core processor (Intel i7 or Xeon) with at least 16GB of RAM and a fast SSD drive for running Photoshop is recommended. It is best to do your image processing on a high quality IPS LCD panel capable of displaying Adobe RGB color gamut. We recommend calibrating your screen using a hardware color calibration solution such as Spyder or Xrite. The consumer LCD screens used in many laptops and low-end desktops suffer from poor contrast ratios and a limited color gamut. Images processed on inferior screens may appear noisy, too dark, too bright, or unsharp. And they will often show a color cast when viewed on a high quality monitor that has been properly calibrated.
Artie’s Take on the guide…
This guide is for serious photographers who wish to maximize the quality of their optimized, noise reduced files and who want to learn to sharpen their images after they are sized for a final usage. The emphasis is on sharpening for electronic presentation. The guide includes the brilliant techniques that Arash developed for applying just the right amount of NR to the subject (while retaining all the fine detail) and then applying a lot more NR to the background where it is almost always needed. His efforts were refined by Arthur Morris to ensure that the guide is clear, concise, easy-to-read, and easy to-easy-to-follow; artie’s great strength is his how-to writing. He has used Arash’s brilliant NR and sharpening techniques on his 15 inch Macbook Pro with Retina Display with great success.
Important Note: The entire guide is based on the remarkable Pro Version of NeatImage. Only the Pro Version supports 16-bit files. This Photoshop Plug-in requires a separate $79.95 purchase. Why NeatImage when there are so many other Noise Reduction programs available?
When someone asked about Topaz Denoise on the blog I got in touch with Arash. here was his response:
It cannot calibrate the noise levels. I tried it. It was garbage.
Best, Arash Hazeghi Ph.D.
To which I added:
In the guide, we teach folks to calibrate noise levels for an image or series of images. As an option, also covered in the guide, we teach you to create a Noise Profile for each ISO with a given camera by photographing a NeatImage calibration target.
Arash continued the next day; this published here for the first time:
Here is a more elaborate answer. A preset is a “one size fit all” solution; it is not the same as a calibration. If you look carefully through your images you will find that the ISO value used and the amount of visible noise in the image aren’t always correlated. An image at ISO 400 can look noisier than an image taken at ISO 3200. Many factors other than the ISO determine the amount of visible noise in an image. Two images taken at the same ISO may require significantly different amounts of NR. Furthermore, different areas of the same image often require different amounts of noise reduction.
The presets are made by looking at the noise characteristics of a flat neutral or 18% grey target with no detail. They don’t include shadows, highlights, grain size, or the possibility of the effects of post-capture exposure boosts. (In other words, images made at a given ISO that are lightened during or after conversion will always exhibit more noise than properly exposed images.) The presets are often made using in-camera JPEGs that have been already noise-reduced, sharpened, and compressed thus smearing (destroying) the fine feather detail. Sometimes they are made from ACR RAW conversions that are vastly inferior as compared to properly executed DPP 4 RAW conversions.
A calibrated noise profile is created for each image in its present form independent of the ISO value, the exposure levels, or the RAW converter. It makes no assumptions. NeatImage NR calibrations can be compared to purchasing a hand-crafted, custom-tailored suit versus buying a suit off the rack at WalMart. In engineering terms, NeatImage calculates the noise spectrum for each image and then with proper adjustment attenuates only the frequencies that don’t overlap with the detail. Other NR tools like Topaz, Nik etc. apply constant attenuation regardless of what the spectrum looks like. Try the guide and see for yourself.
PLEASE NOTE: This guide is sent out manually, so there may be a day or two delay if ordered on a weekend

